Filtering Events
In addition to the standard filters, you can create your own.

Creating an Event Filter
To create a custom event filter:
- Navigate to Monitoring > Events.
-
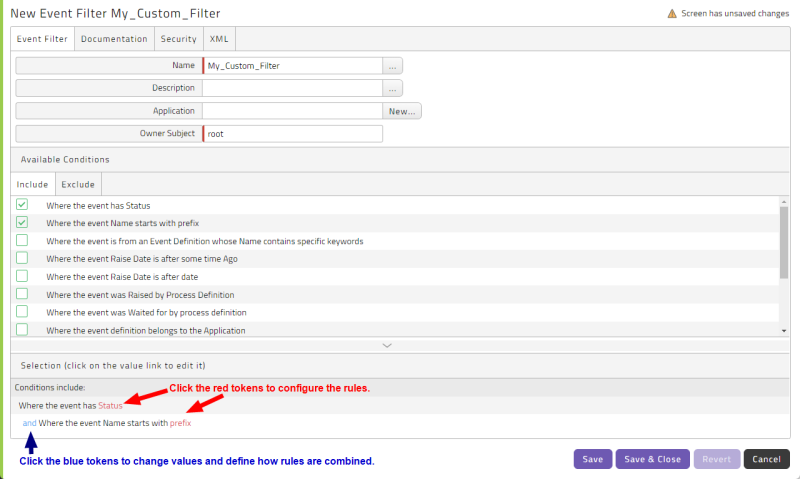
Right-click in the area where the events are listed and choose Filter > New Filter from the context menu. The New Event Filter window displays.
- Enter a Name.
- Use the check boxes in the Include and Exclude tabs under Available Conditions to add rules to the filter. For each condition, you may see a red token indicating a value you need to specify. Click this red token to select a value or values. Once you specify a value, it turns blue, and you can click it again to edit it.
- If you are combining conditions, a blue operator token displays at the beginning of all conditions after the first. Click this token to toggle it between and and or.
- When you are finished, click Save and Close. Your custom filter is added to the filter dropdown list.
Available Conditions
You can use the following conditions to create customized event filters.
- Where the event has Status
- Where the event Name starts with prefix
- Where the event is from an Event Definition whose Name contains specific keywords
- Where the event Raise Date is after some time Ago
- Where the event Raise Date is after date
- Where the event was Raised by Process Definition
- Where the event was Waited for by process definition
- Where the event definition belongs to the Application
- Where the event belongs to Application containing specific keywords
- Where the event was modified manually
- Where the event is part of the system
- Where the event complies with IntelliSearch search string
- Extend filter with user-defined SQL: This is a special case that lets you define or extend a filter rule using SQL query syntax. Use ANSI SQL92 standard
where-clausesyntax. The available columns are listed in the Event Filter Columns topic. For example, to display events which were raised by a subject with ID82171, you could useRaiserUniqueId = 82171.