Creating a Workflow Definition
To create a Workflow Definition:
-
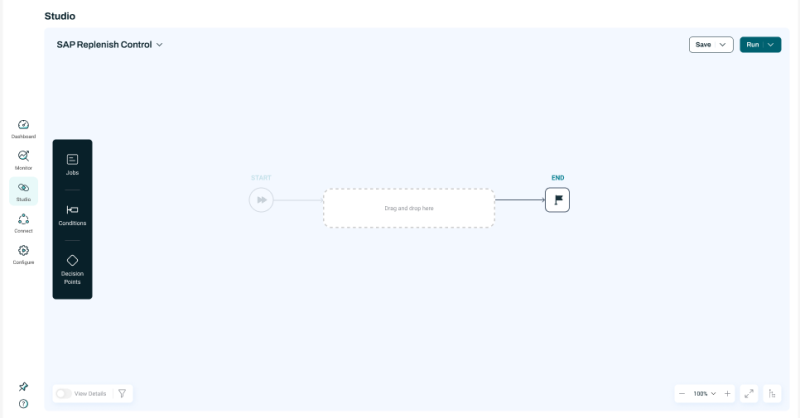
Navigate to the Studio screen.
-
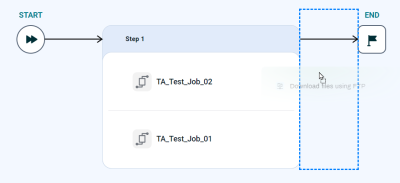
Click Create Workflow. An empty Workflow displays, with a single empty Step.
-
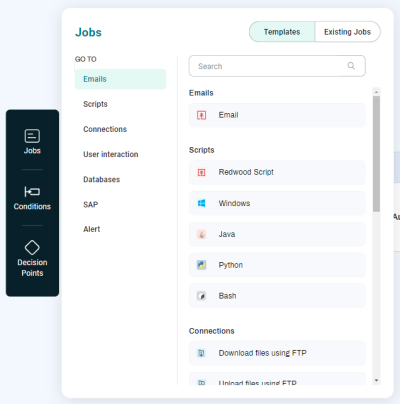
Click Jobs in the Toolbar to display the Jobs overlay.
-
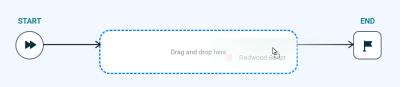
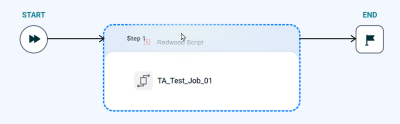
Add Job Calls to the Workflow by dragging and dropping Job Definitions from the Jobs overlay. You can drag a Job Definition into an existing Step or create a new Step.
-
If this is the first Job Definition you are adding to the Workflow, drag and drop the Job Definition onto the default empty Step.
-
If you want to add the Job Definition to an existing Step, drag the Job Definition to just above or below one of the Job Calls in the Step.
-
If you want to add a new Step before or after an existing Step, drag the Job Definition to the right or left of that Step.
-
-
Configure the Workflow Definition. This part of the procedure is similar to the procedure for configuring a Job Definition.
-
Perform any required Parameter mapping.
Warning: If you add a Job Call to a Workflow, and then select it in the Workflow Editor and click Edit Job at the top of the Job configuration overlay, you can use the Parameters tab on the left to add Parameters, delete Parameters, and change the configuration of existing Parameters. However, if you do so, those changes are written back to the Job Definition, not just the instance in the Workflow. This can lead to unexpected behavior when the Job Definition is run elsewhere (on its own or in other Workflows).
-
Conditions let you control when a Job runs. If desired, add an Event Condition or a Time Condition to the Workflow Definition.
-
Decision Points let you control the execution of a Step or Workflow based on status, time, or a REL expression. If desired, add Decision Points to the Workflow Definition.
-
To view execution paths for Decision Points, turn the View Details switch on.
-
To scale the diagram up or down, use the scale controls at lower right.
-
To save the Workflow, click Save.
-
To run the Workflow with the Run Wizard, click Run.