Working with the Mail Connector
Creating a Mail Connector
To add a mail connector, follow this procedure:
- Open the Control Center on the left-hand navigation bar.
- Select Mail Connectors from the Environment dropdown list.
- Click
 . The New Mail Connector window displays.
 -
Configure the Mail Connector (see table after this procedure).
- Click Check connection test the connection.
- Press Save & Close.
| Field | Description |
|---|---|
| Username | The username for the account receiving the answered message. |
| Password | The password for the account. |
| Protocol |
Communication protocol accepted by the email server. Supported options are as follows:
|
| E-mail server name or ip | Server name or IP address of the email server. |
| Server Secret | This is set automatically, but you can override it if you need to use a specific secret. |
| Inbox Folder | The folder to be checked for incoming emails (typically Inbox). |
| Error Folder | The folder where an incoming email will be moved if the reactor process does not finish successfully. This folder will be automatically created within the receiving email account if it does not already exist. |
| Processed Folder | The folder where the incoming email will be moved when the reactor process finishes successfully. This folder will be automatically created within the receiving email account if it does not already exist. |
| Polling Interval | The number of seconds between checks of the email account. |
| Process Definition | The Chain Definition to run for each valid email received. By default, this is Redwood_Mail_Reactor. |
| Start On Startup | Check this to start the Mail Connector automatically when RunMyJobs starts. |
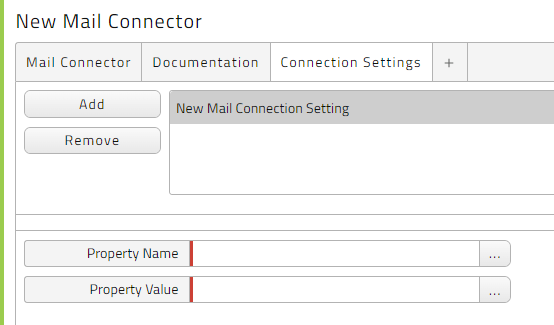
If you need to add additional connection settings as name/value pairs, use the Connection Settings tab. For more information, see the JavaMail API IMAP protocol documentation.
Using OAuth 2.0
Settings for Microsoft Azure Active Directory:
- App registration
:
- Public client flow allowed for App authentication
- Delegated Microsoft Graph API permissions:
IMAP.AccessAsUser.Alloffline_access- Granted consent for all API permissions
- Additional connection settings for the Mail Connector:
redwood.connection.oauth.provider- The OAuth 2.0 token provider. Currently only
outlookis supported.
- The OAuth 2.0 token provider. Currently only
redwood.connection.oauth.client- The Application (client) ID of the app registered in Microsoft Azure Active Directory.
redwood.connection.oauth.tenant- The Directory (tenant) ID of the app registered in Microsoft Azure Active Directory.
redwood.connection.oauth.authority(optional)- The OAuth 2.0 authorization endpoint. This setting is optional and defaults to the Azure Active Directory authorization endpoint URL: https://login.microsoftonline.com/ The Mail Connector passes a scope request such as “Mail.ReadWrite” to the authorization endpoint, in order that access will be granted and an OAuth 2.0 token obtained.
Using Microsoft Graph
Settings for Microsoft Azure Active Directory:
- App registration:
- Public client flow allowed for App authentication
- Delegated Microsoft Graph API permissions:
Mail.ReadWrite- Granted consent for the API permission
- Settings for the Mail Connector:
- Protocol: MS Graph
- E-mail server name or ip: https://graph.microsoft.com/v1.0 (Graph endpoint)
- Connection settings for the Mail Connector:
redwood.connection.oauth.client- The Application (client) ID of the app registered in Microsoft Azure Active Directory.
redwood.connection.oauth.tenant- The Directory (tenant) ID of the app registered in Microsoft Azure Active Directory.
redwood.connection.oauth.authority(optional)- A custom authority URL. This setting is optional. If this is not set, the default URL https://login.microsoftonline.com/ is used.
redwood.connection.oauth.use_client_secret(optional)If this value is set to
true, you can log in to Microsoft Azure Active Directory using an Application (client) ID (seeredwood.connection.oauth.client, above) and client secret. After you set this value, you can enter the client secret in the Password field.
Starting and Stopping a Mail Connector
To start or stop a Mail Connector, navigate to Environment > Mail Connectors, then right-click the Mail Connector and choose Start or Stop from the context menu.
Monitoring a Mail Connector
To monitor a Mail Connector, view server1/logs/scheduler.log, or watch for an Operator Message in the Mail Connector details. You can also use the System_DynamicTrace Process Definition with the package com.redwood.scheduler.mail.connector for specific tracing details.