Creating a Workflow
To create a Workflow:
-
Navigate to the Studio screen.
-
Click Create Workflow. An empty Workflow displays, with a single empty Step.

-
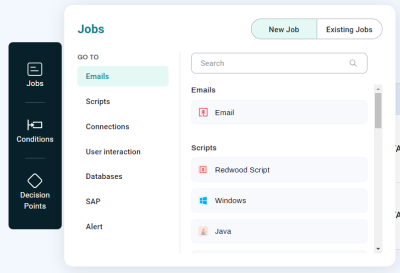
Click Jobs in the Toolbar to display the Jobs overlay.
-
Add Jobs to the Workflow by dragging and dropping them from the Jobs overlay. You can drag a Job into an existing step or create a new Step.
-
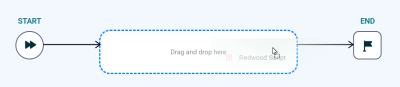
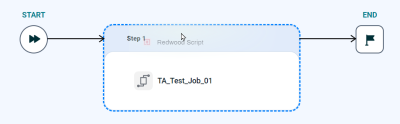
If this is the first Job you are adding to the Workflow, drag and drop the Job onto the default empty Step.
-
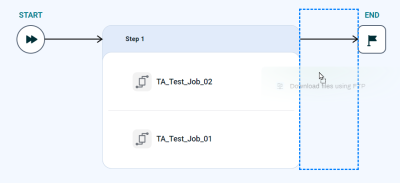
If you want to add the Job to an existing Step, drag the Job to just above or below one of the Jobs in the Step.
-
If you want to add a new Step before or after an existing Step, drag the Job to the right or left of that Step.
-
-
Configure the Workflow definition. This part of the procedure is similar to the procedure for configuring a Job definition.
-
Conditions let you control when a Job runs. If desired, add an Event Condition or a Time Condition to the Workflow definition.
-
Decision Points let you control the execution of a Step or Workflow based on status, time, or a REL expression. If desired, add Decision Points to the Workflow definition.
-
To view execution paths for Decision Points, turn the View Details switch on.
-
To scale the diagram up or down, use the scale controls at lower right.
-
To save the Workflow, click Save.
-
To run the Workflow with the Run Wizard, click Run.